When we built our home, we made the decision to do a lot of the upgrades ourselves rather than paying the builder to do it. This meant that we moved into a brand new home that still needed “work”. The bathroom downstairs is the last room we need to tackle on the main floor. While it really isn’t that bad, the decor really doesn’t go with the rest of the house.
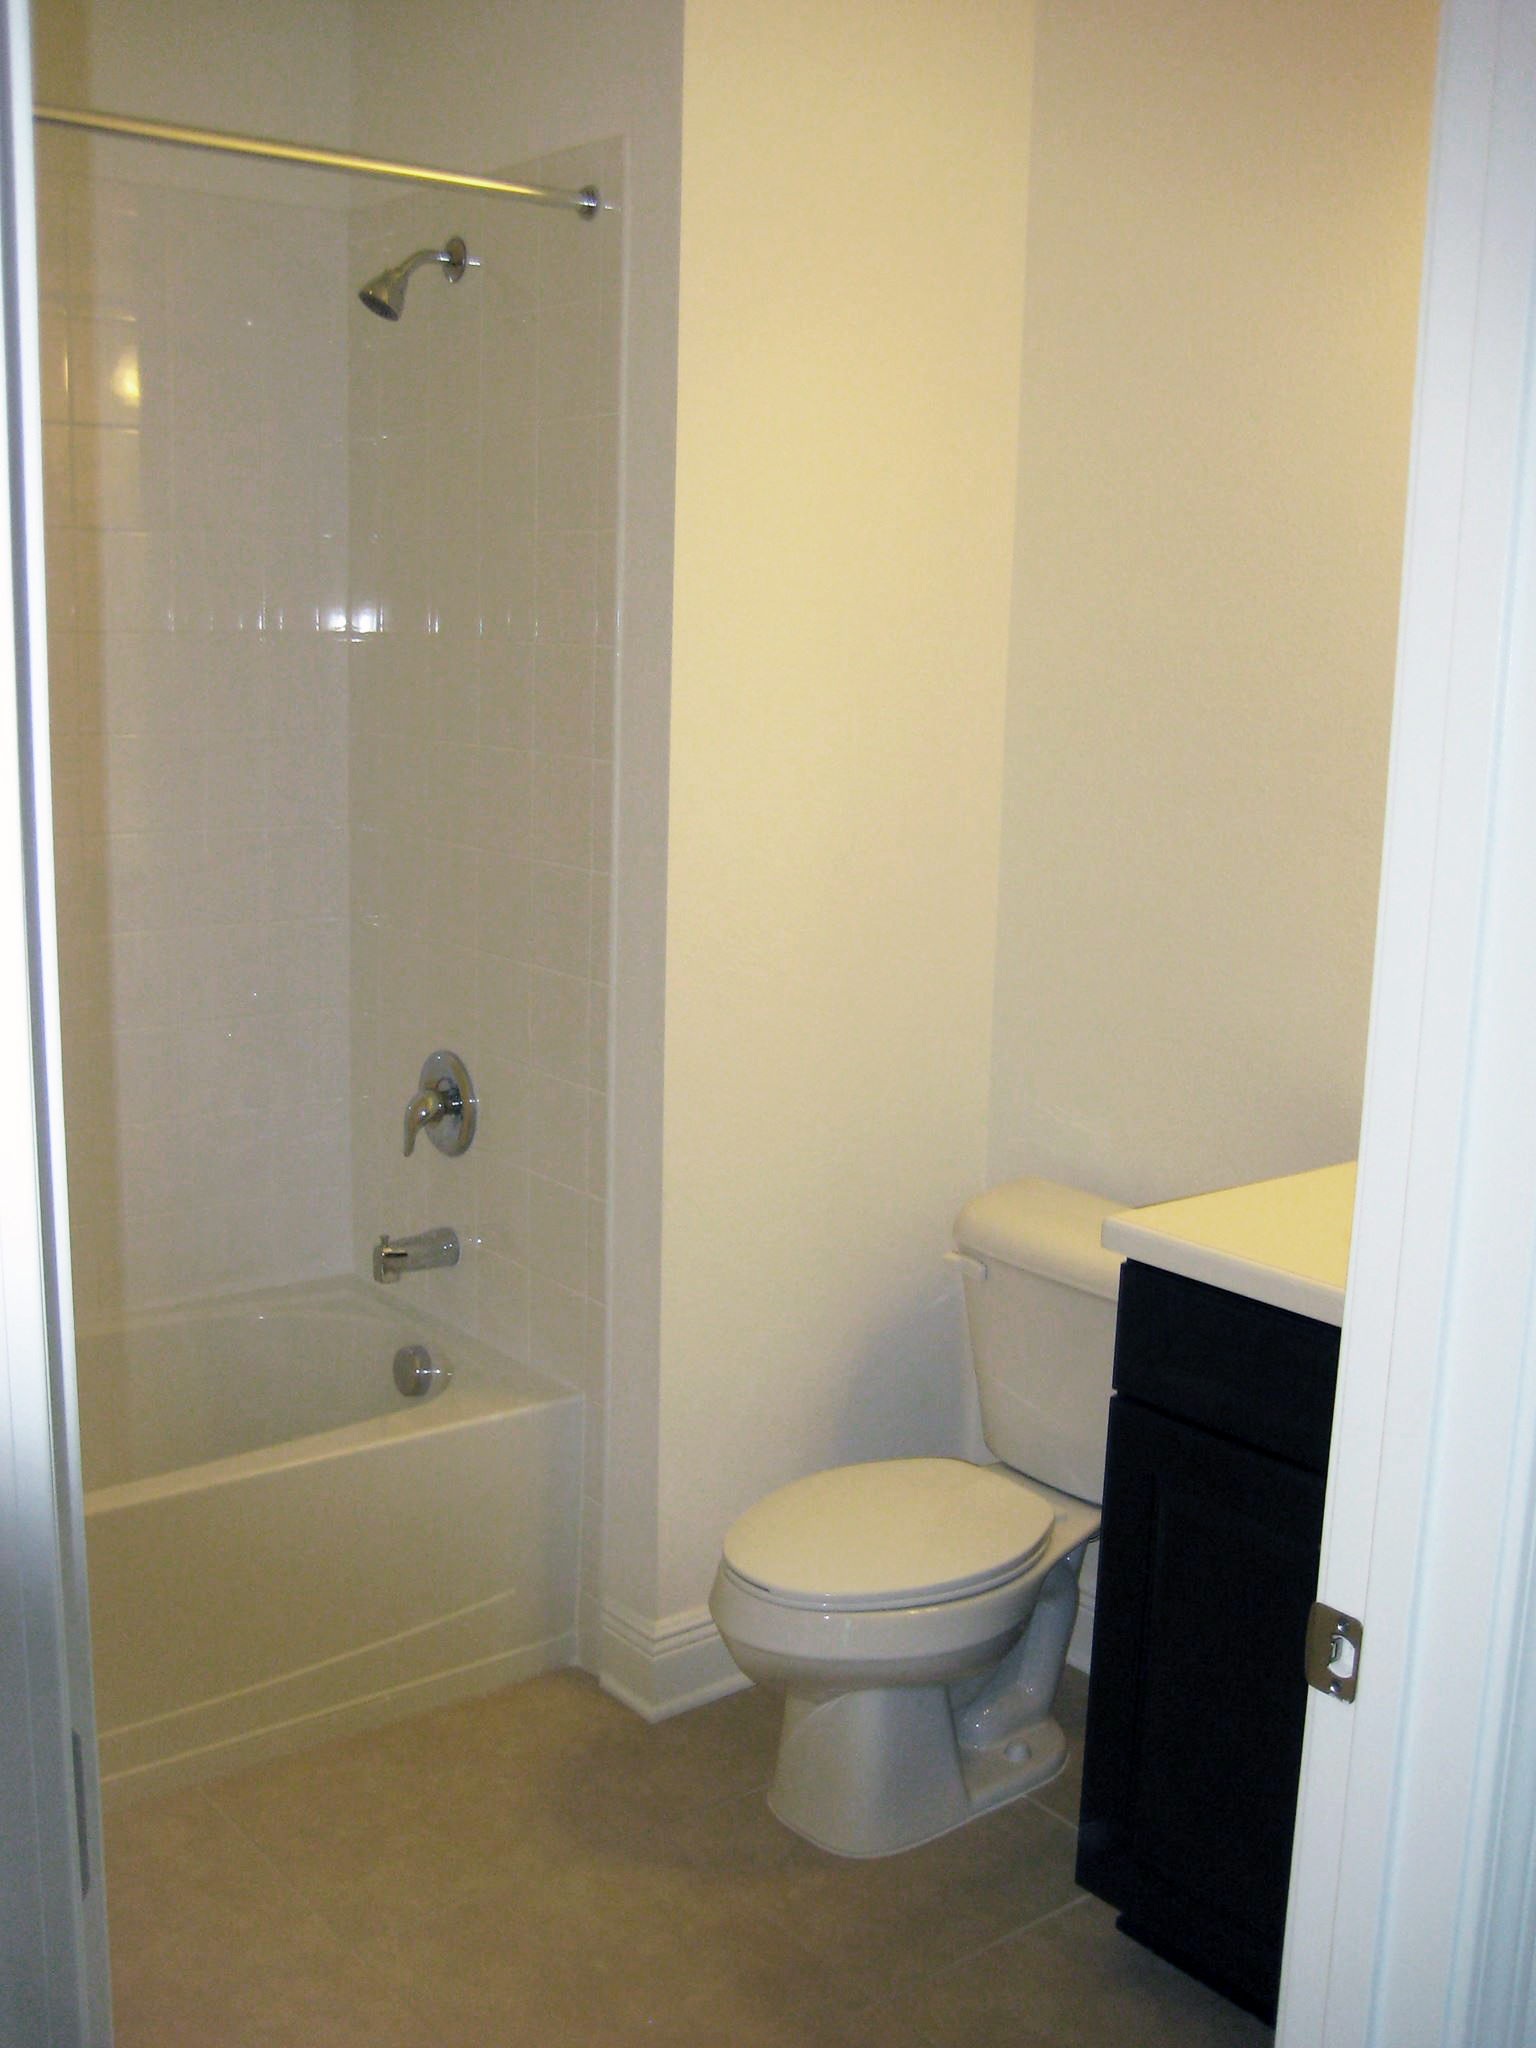
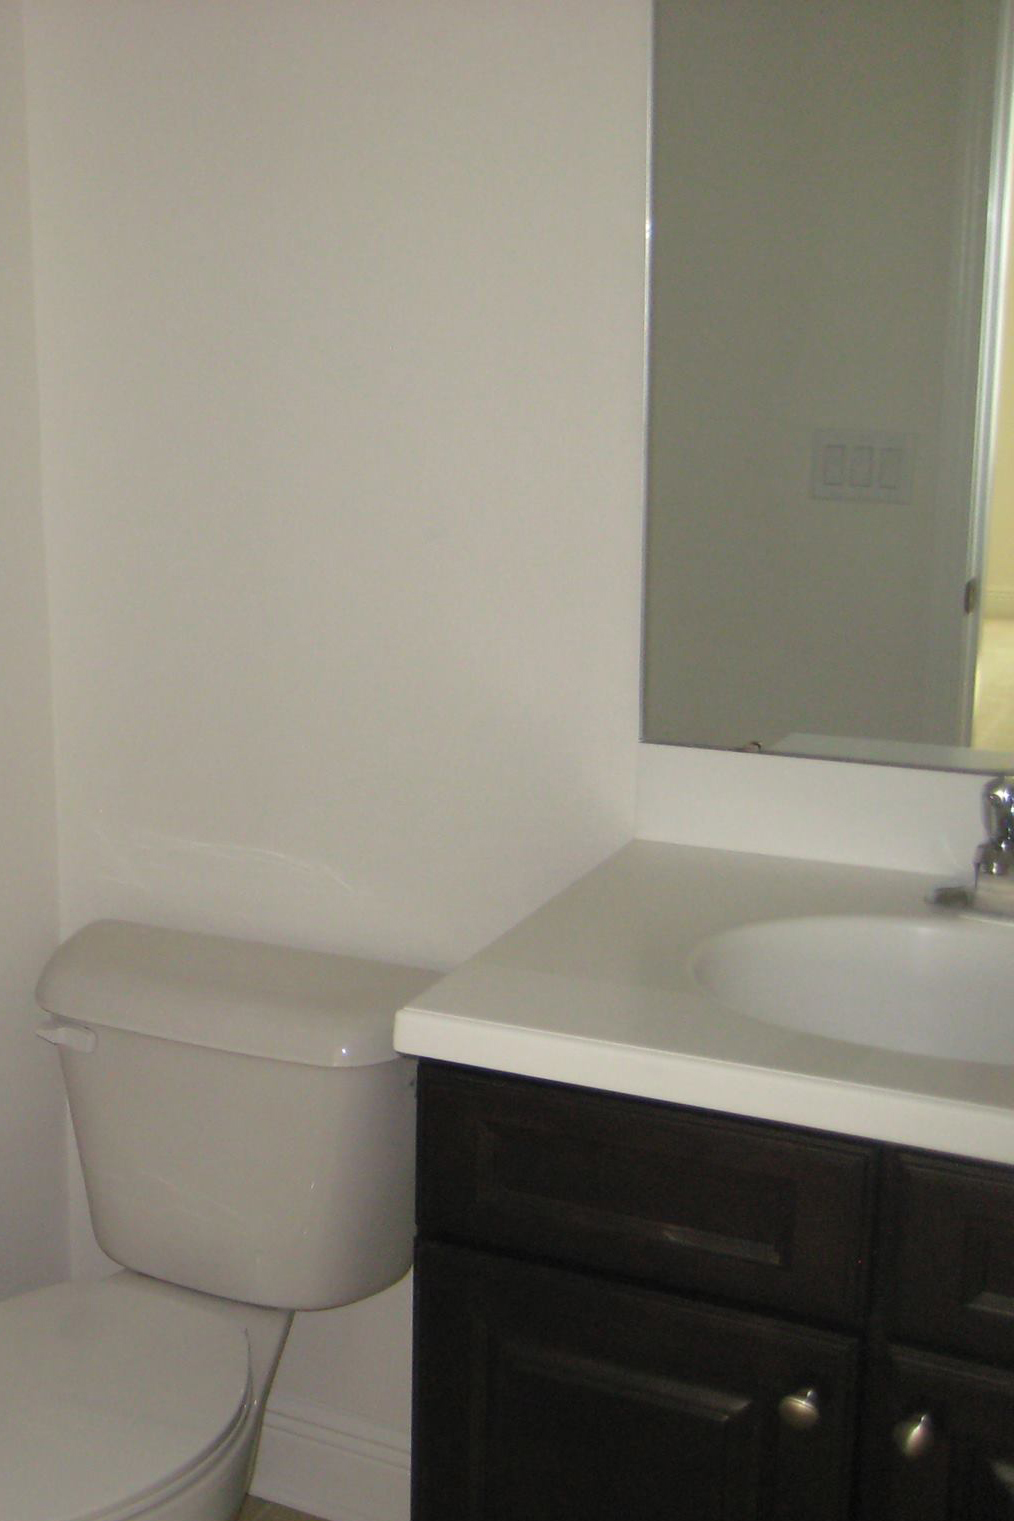
This is the current state of the bathroom:
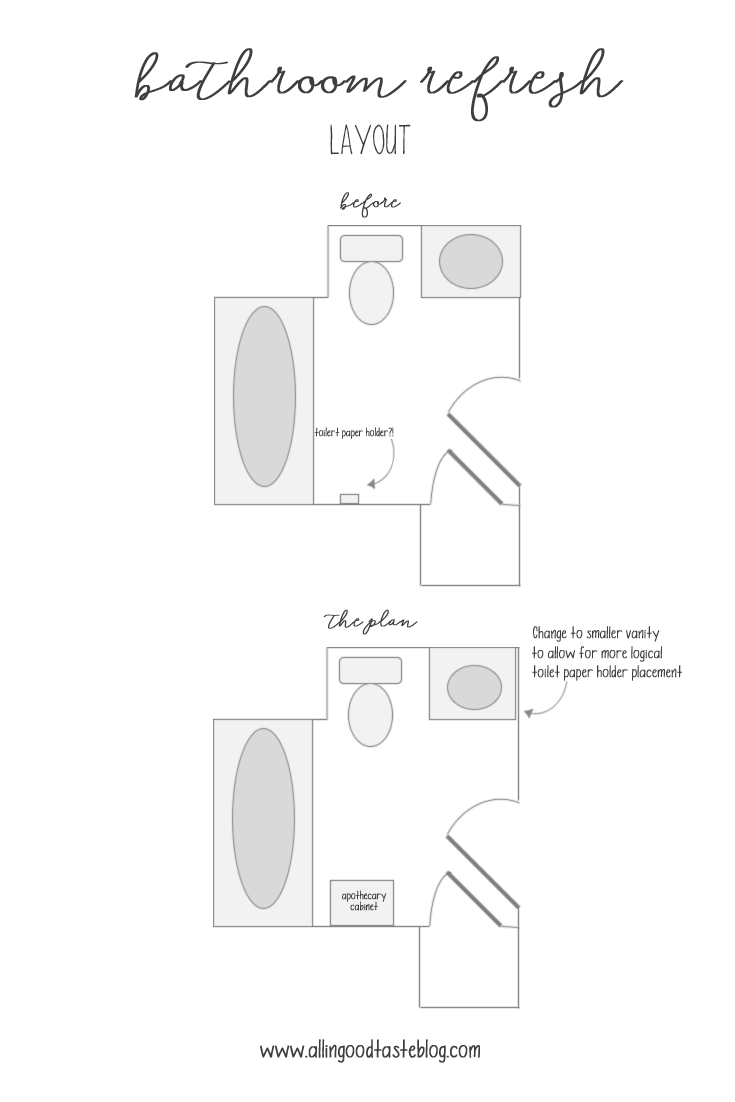
As I said, it is not terrible. It is, however, very basic and has a few layout issues. The primary issue with the layout is that the size of the current vanity and the placement of the toilet do not allow for the toilet paper holder to be located near the toilet. Thus, the toilet paper holder is currently located about 4 feet away from the toilet. While this may not sound like a big issue, not being able to reach the toilet paper from the toilet is super annoying!
To better orient you in the space, here is a floor plan of the space now as well as the plan for the reconfiguration.
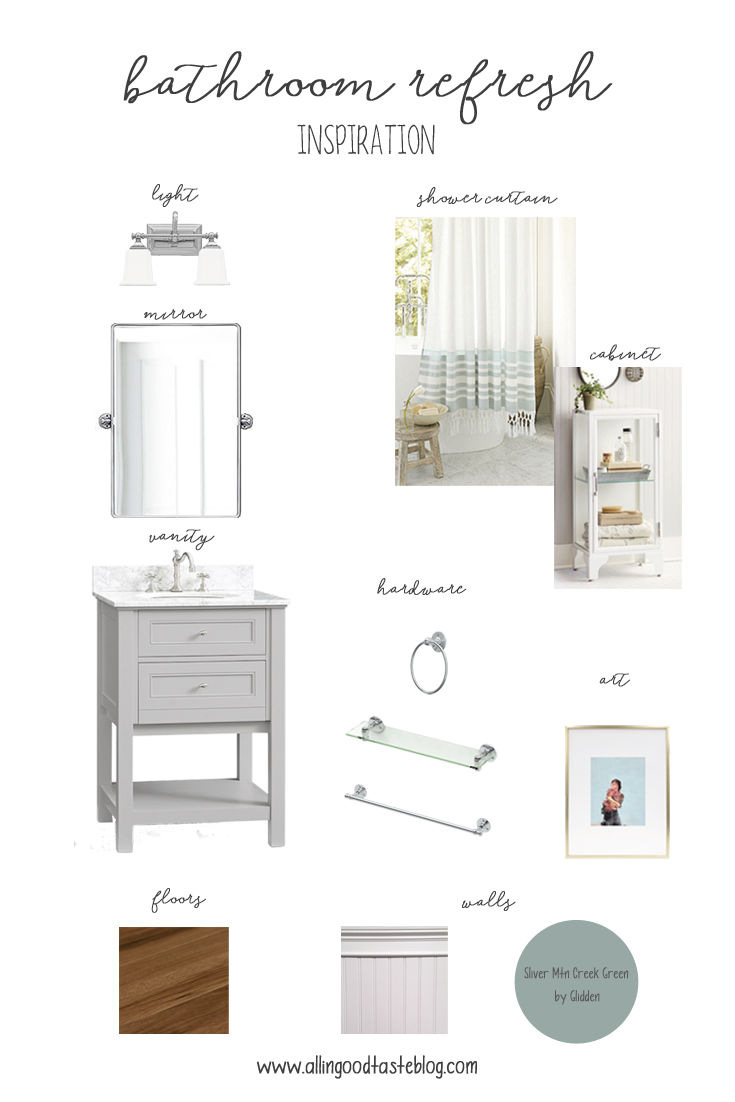
The reason I’m just calling this a bathroom “refresh” is that we are not planning to change out everything in the bathroom. The only big things we are changing are the floors (which requires demoing the current tile floors) and the vanity. The bathtub, tile surround, and toilet are all staying the same. We will also be changing the fixtures, adding trim, and painting the walls.
I want the feel of the bathroom to be consistent with the rest of the downstairs. We will install wood plank ceramic tiles to tie into the wood floors throughout the rest of the main level. We also plan to install bead board on the lower portion of the wall to maintain the millwork we’ve added throughout the house. We will paint the upper part of the wall a deeper teal/green, which will blend nicely with the lighter green on the walls leading into the bathroom.
I’m so excited for this project! I think it is going to turn out so well. I’ll post the finished product soon.
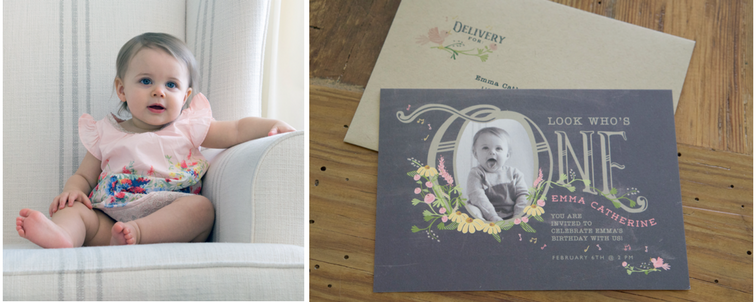
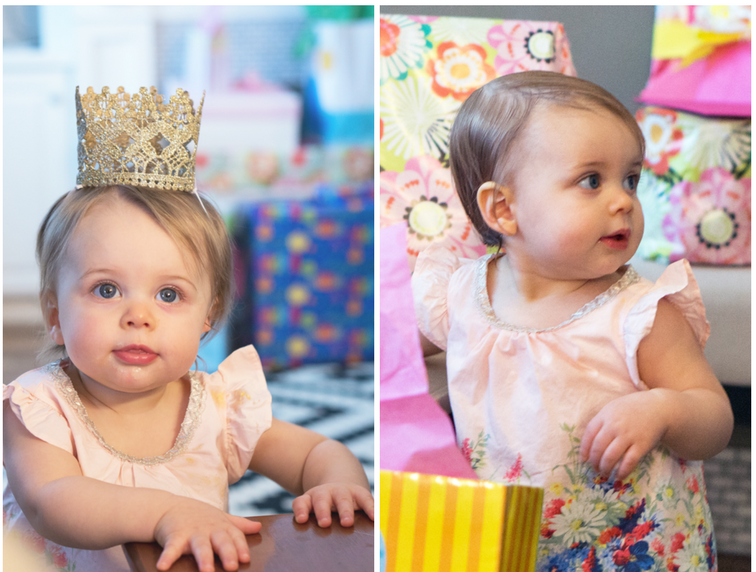
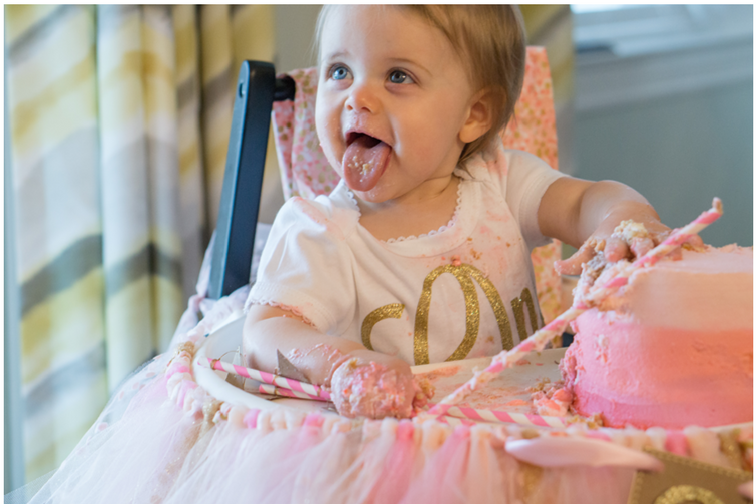
I can’t believe Emma is already one year old! Though it is hard to see my baby growing up so fast, it gave me the perfect excuse to go all out with a pink and gold birthday party. I decided not to go too specific with the “theme”, but I knew I wanted the overall feel of the party to be sweet and girly. I am so pleased with how everything came together.
The main inspiration for the party decor came from her sweet dress and the lovely invitations from Minted*. I added some extra trim to the neckline and hem of her dress to make it a little more special. For the party decor, I used a combination of store-bought and DIY items. Not only do I really enjoy a good DIY project, but it also helped keep costs down.
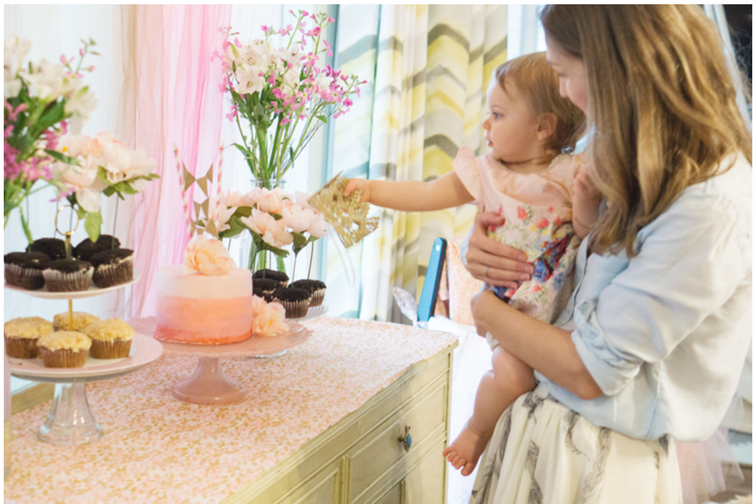
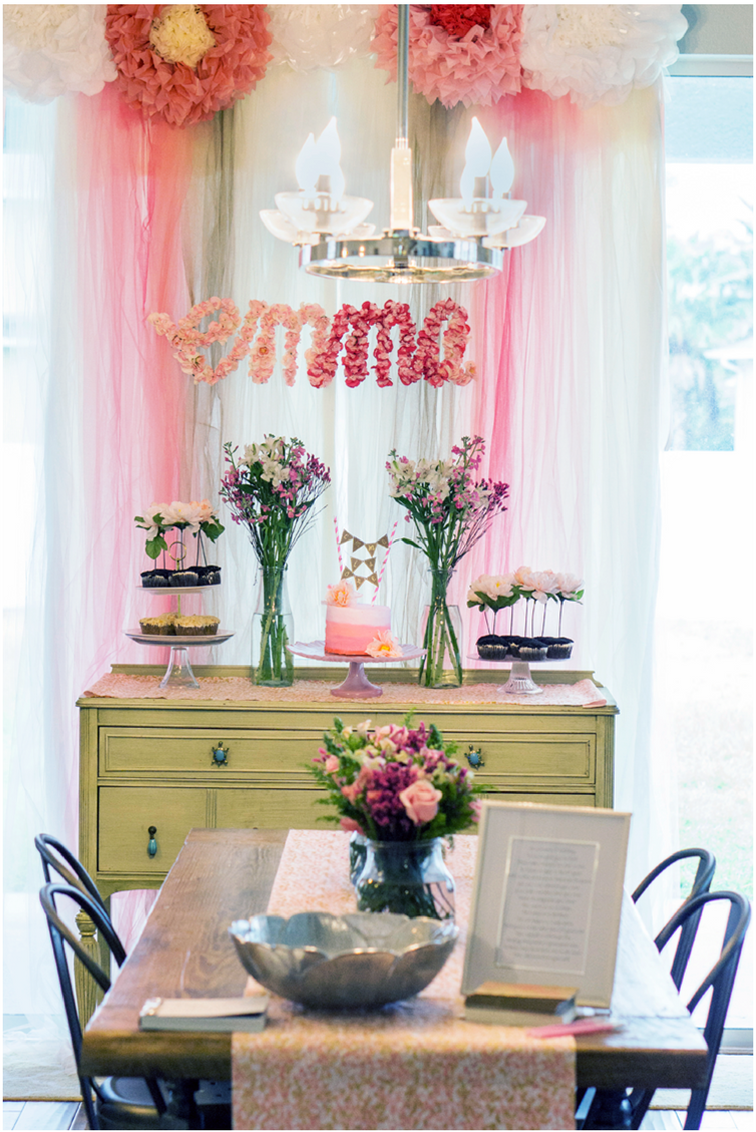
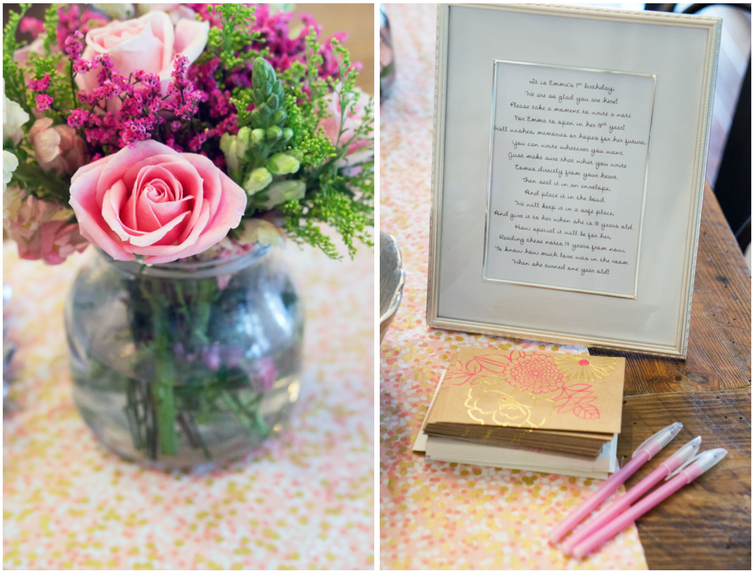
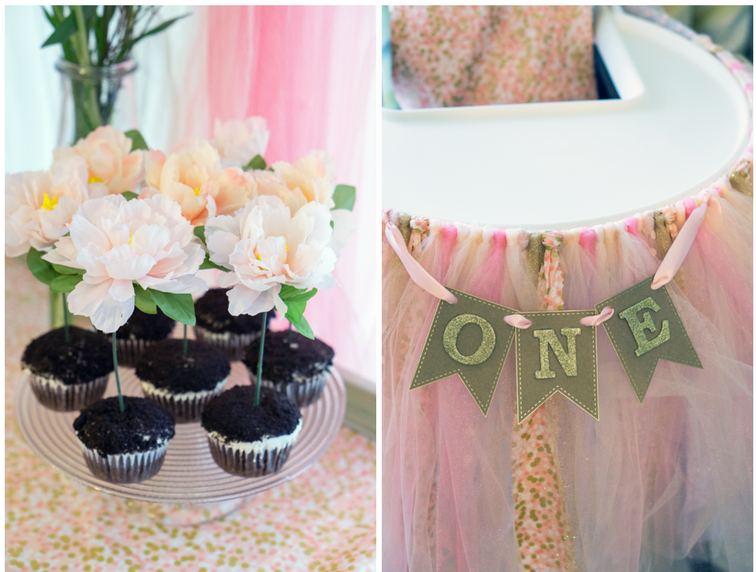
I made the backdrop for the cake table using tulle in various shades of pink, peach, gold, and white to create the ombre effect. I added large paper flowers to the top to finish the look. The “emma” sign was another DIY made with foam core board and inexpensive fake flowers. I found some really pretty fabric in my colors and simply cut it into runners for the tables. My sister and I put together the flower arrangements using store bought flowers.
As a special touch, I had each of the guests write a note to Emma for her to open on her 18th birthday. The frame at the end of the table contains a poem that I wrote to explain the purpose of the notecards. I had each guest seal their notes in an envelope and after the party I put the envelopes in a safe place to save for Emma’s 18th birthday. Since I know Emma will not remember this very special first birthday party, I think this will be such a special gift to give to her when she turns 18!
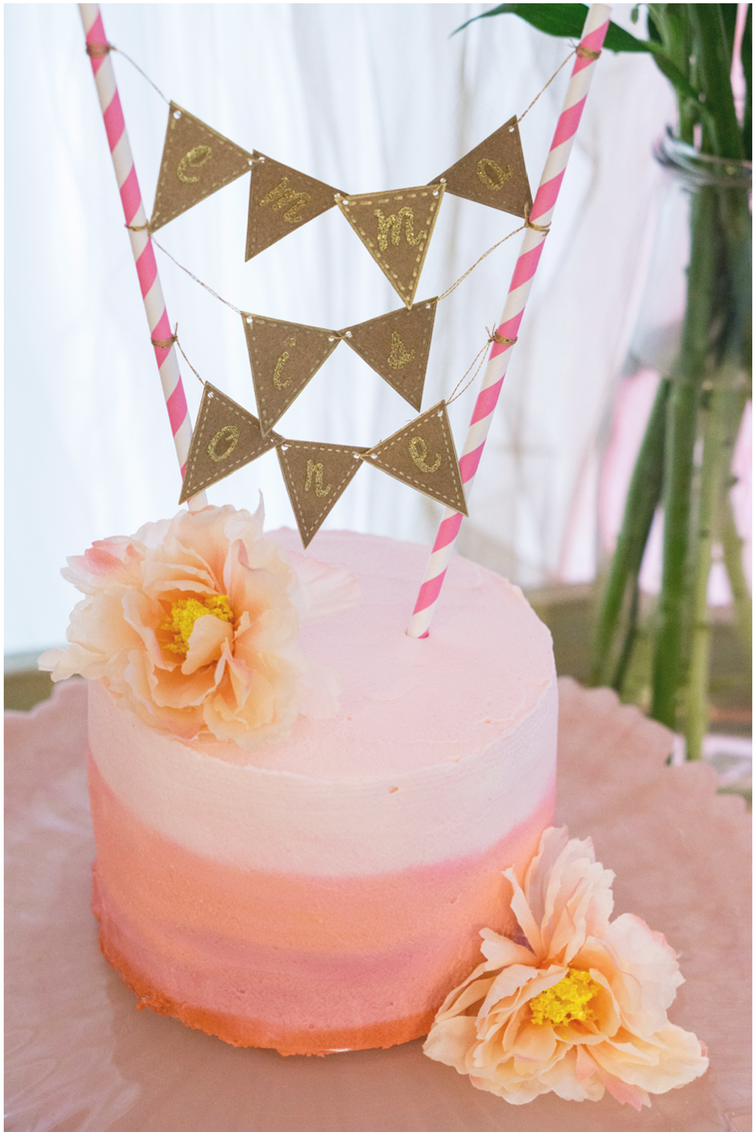
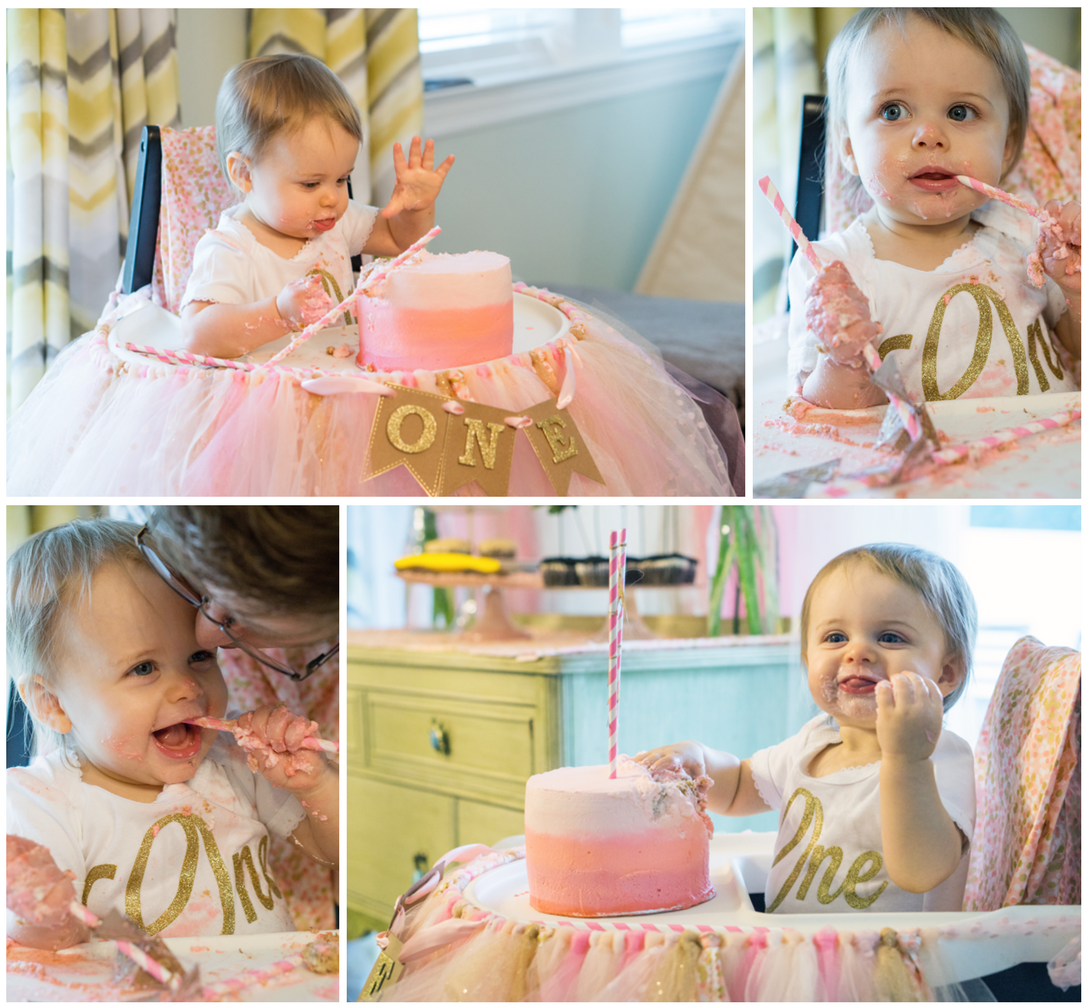
The smash cake is a banana cake frosted with a lightly sweetened stabilized whipped cream. This is a great tutorial for achieving the ombre effect on the cake. I made the “emma is one” cake topper with a couple of paper straws, card stock, and some glitter letter stickers. The cupcakes are devil’s food chocolate cupcakes with a mascarpone frosting and dipped in crushed up chocolate sandwich cookies to give a “dirt” appearance. Each cupcake is finished with a single faux flower stem (note: I washed the stems of the flowers before placing them in the cupcakes). Both cake recipes are from this recipe book (it is one of my favorites!). The skirt and banner on the highchair are two more DIYs.
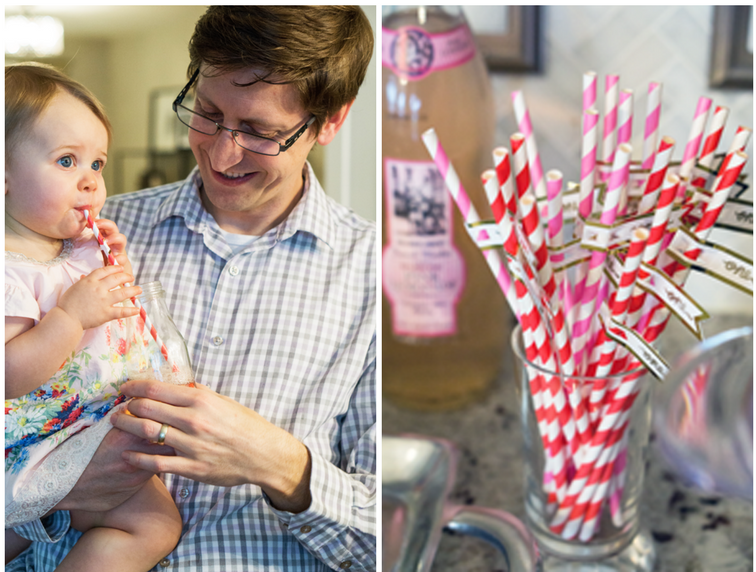
Guests enjoyed sparkling lemonade from Trader Joe’s from glass bottles. The bottles are actually recycled from store bought drinks, with the labels removed. I added paper flags with “one” written on them to the paper straws.
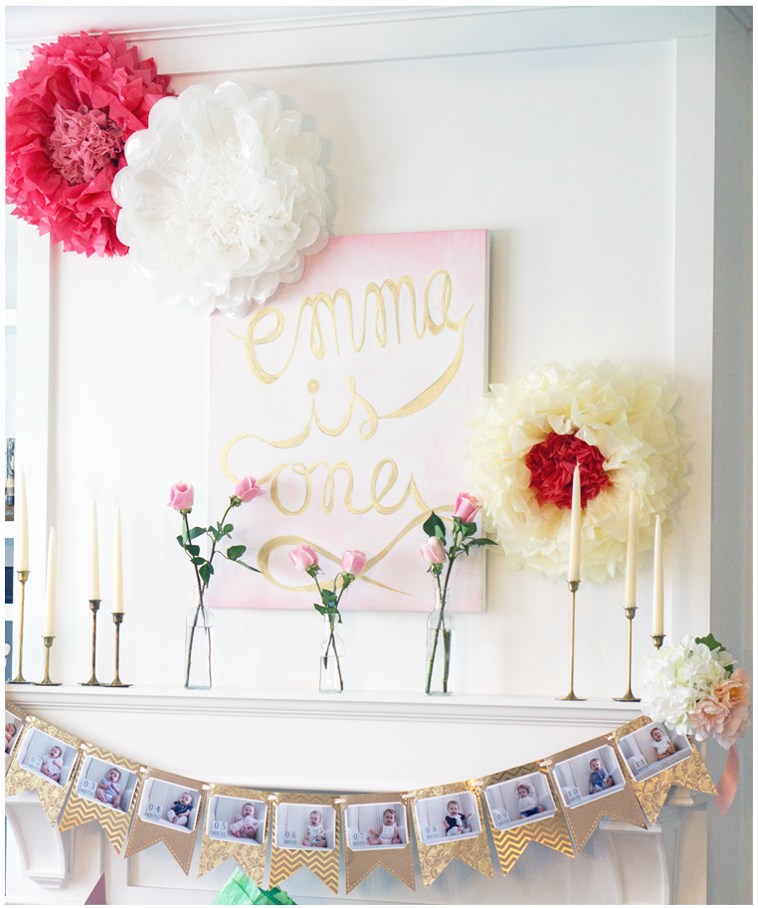
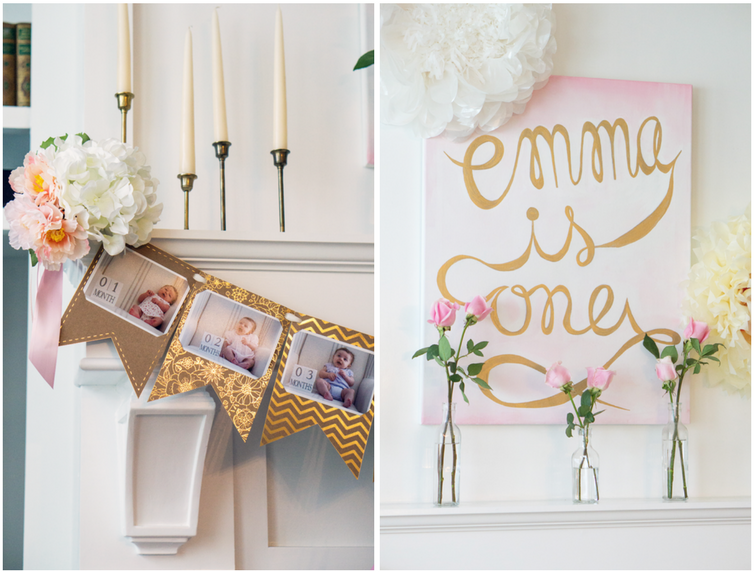
The fireplace features a few more paper flowers, some simple flower arrangements, and a banner with Emma’s monthly pictures for the first 11 months of her life. The “emma is one” canvas was painted by yours truly.
As you can probably tell from the pictures, this little one loved her cake smash (it was really the first time she tasted anything with a reasonable amount of sugar in it). I changed her into a glittered “One” bodysuit for the cake smash so that her dress would remain clean to open presents.
While Emma’s first year has been full of highs and lows, the party was really just an exclamation point on the best (yet most exhausting) year of my life so far. The party honestly turned out better than I had envisioned and Emma seemed to really enjoy it (even if she didn’t know exactly what all of the fuss was about). Overall, I’d call this party a success!
Sources: Invitations – Minted Fabric for backdrop, table runners, and highchair skirt – Fabric.com (pink dot, tulle) Paper flowers – Martha Stewart (exact, similar, similar) Dress – Gap (sold out) “One” bodysuit – Chic Pipsqueak on Etsy Glitter crown – DIY, but LoveCrush Crowns on Etsy has beautiful ready-made options Paper straws – Target (pink, red) Cake plates – Homegoods Flowers – arranged by my sister and me Cake & cupcakes – made by me
Thanks for stopping by today! Until next time…
~ Elizabeth
*Note: This is post is not sponsored by anyone and none of the links are affiliate links. I included the links (when possible) as a resource only.
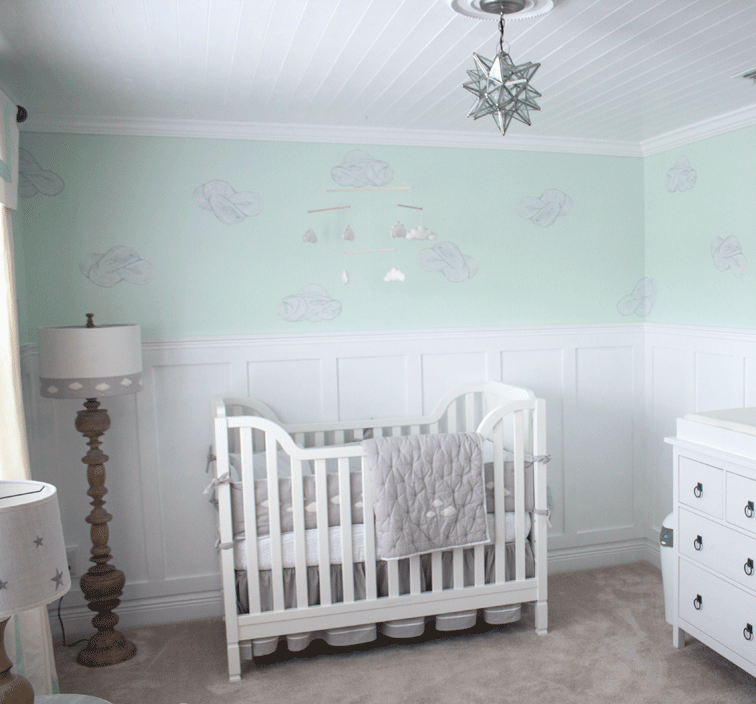
When we found out I was pregnant, my husband and I decided not to find out the gender of the baby. This meant that we not only had to come up with a name for a boy and a girl, but also that the nursery needed to be gender neutral. With this in mind, I immediately knew I wanted to use a color palette of taupe, gray, and mint green–colors that would work for either a boy or a girl and would mix well with accents of pink or blue if I decided to add any once the baby was born.
After falling in love with this bedding from Restoration Hardware Baby & Child and this wallpaper from Hygge & West, I decided to go with a clouds and stars theme. I also wanted to make sure the room felt special–like a jewelry box (with a little less bling 😉 ). The room is small, so I took my husband up on the offer to install a beautiful planked wood ceiling with crown moulding (something I wanted to do downstairs, but was not feasible) as well as board and batten on the walls. I couldn’t be happier with how the room turned out!
My vision for the room was to paint the walls mint green, but I also wanted to use the Hygge & West Daydream wallpaper. So I compromised and decided to cut the clouds out from the removable wall paper tiles, and use them like decals. While cutting the clouds out was tedious, the benefit of this was I only needed six tiles to do the whole room (and I still had clouds and birds that I could use in another room) and I ended up with a completely unique wall treatment. We started by installing the board and batten and painting the upper portion of the walls Spearmint Stick by Behr. I then applied the clouds in a semi-random pattern around the room. I think it turned out so great!
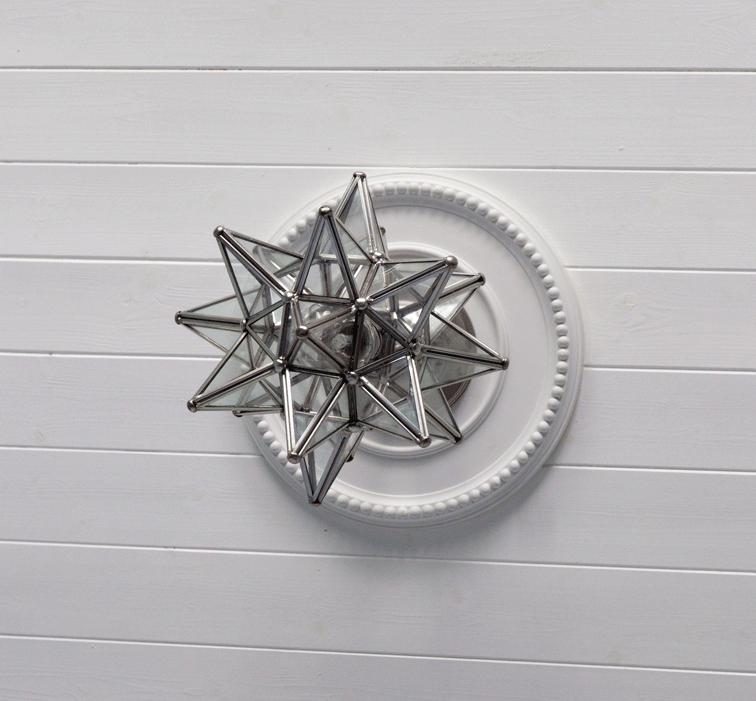
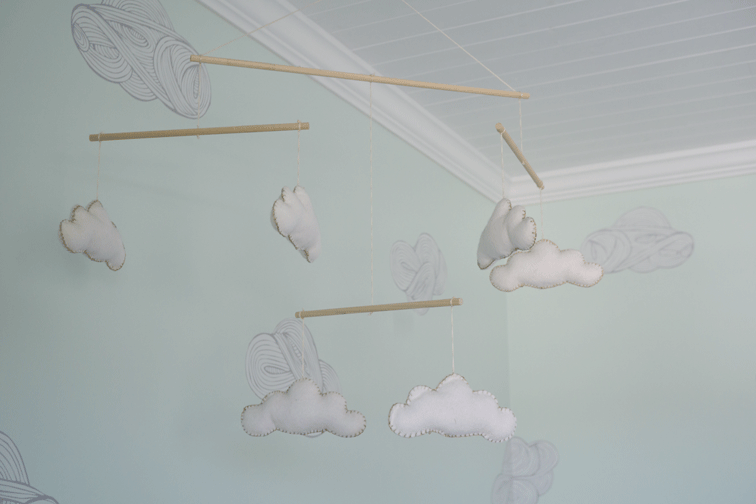
For the ceiling light fixture, I really wanted a Moravian star pendant. The two limiting factors were size (the ceilings are only 8 feet) and price. I ended up going with this one, as at the time, I was able to get it for less than $100. It did however require converting the fixture from a plug-in to a hardwired fixture (including adding a ground wire), as well as purchasing a separate light canopy to complete the installation (Note: this conversion of the fixture should be completed by a licensed electrician). The mobile is a DIY based on this one from RH Baby & Child. The lamp is from Target.
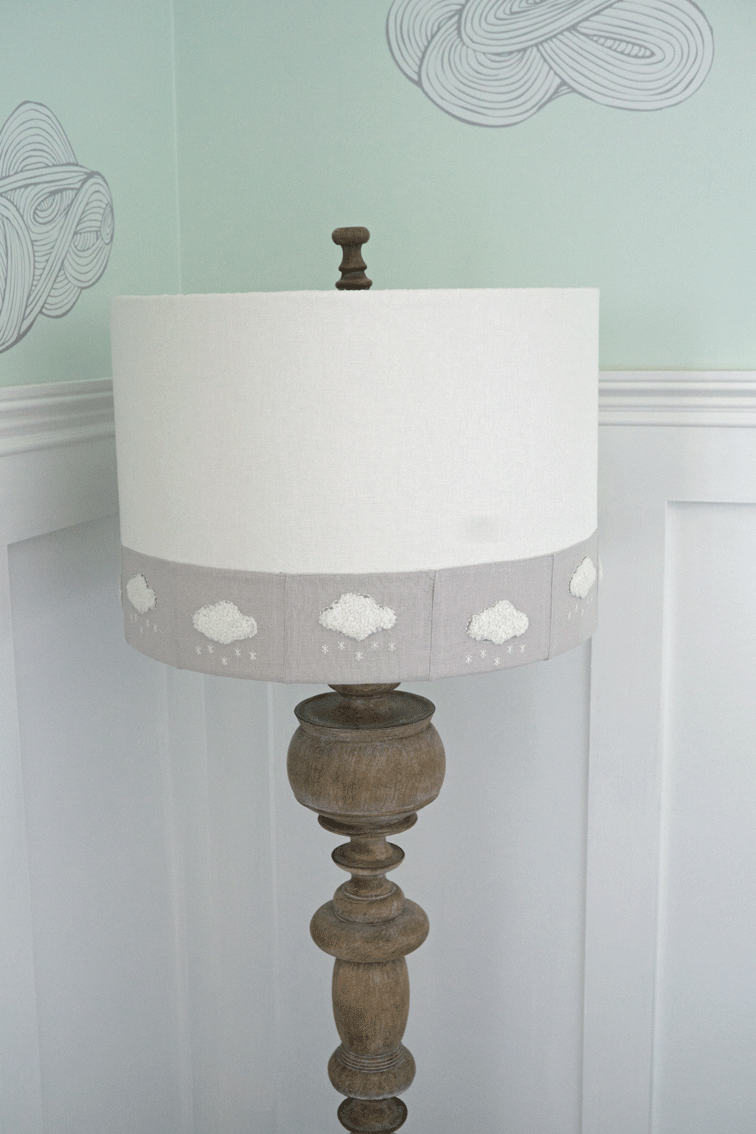
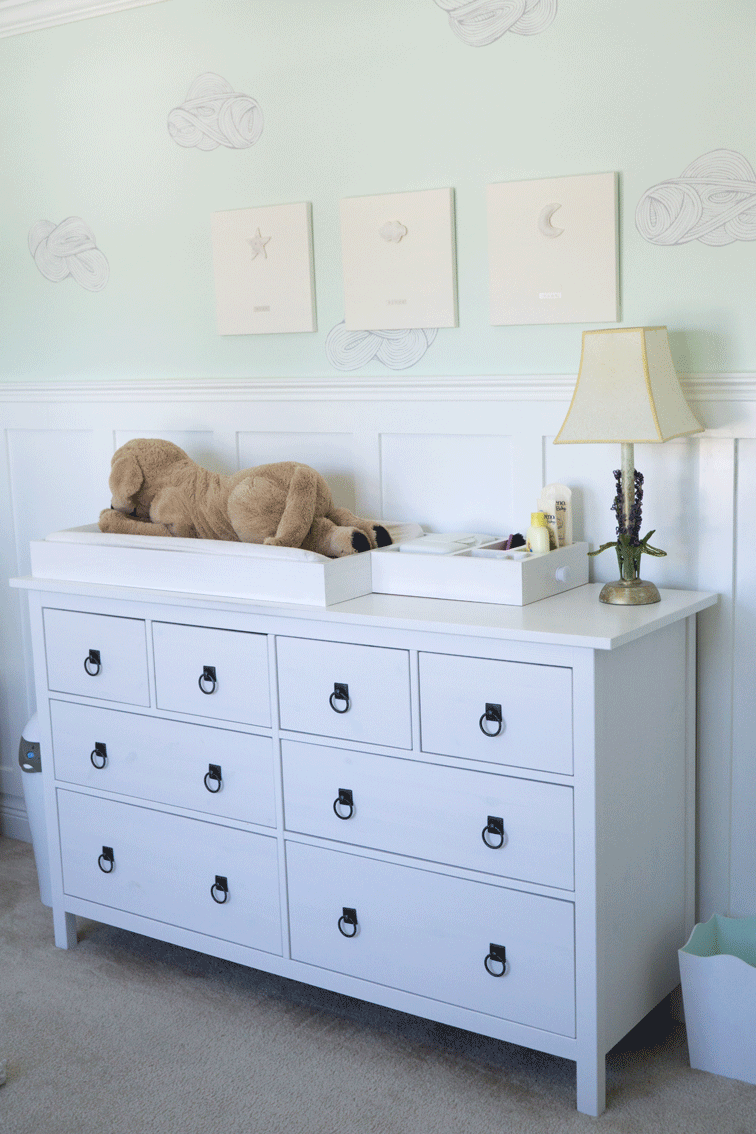
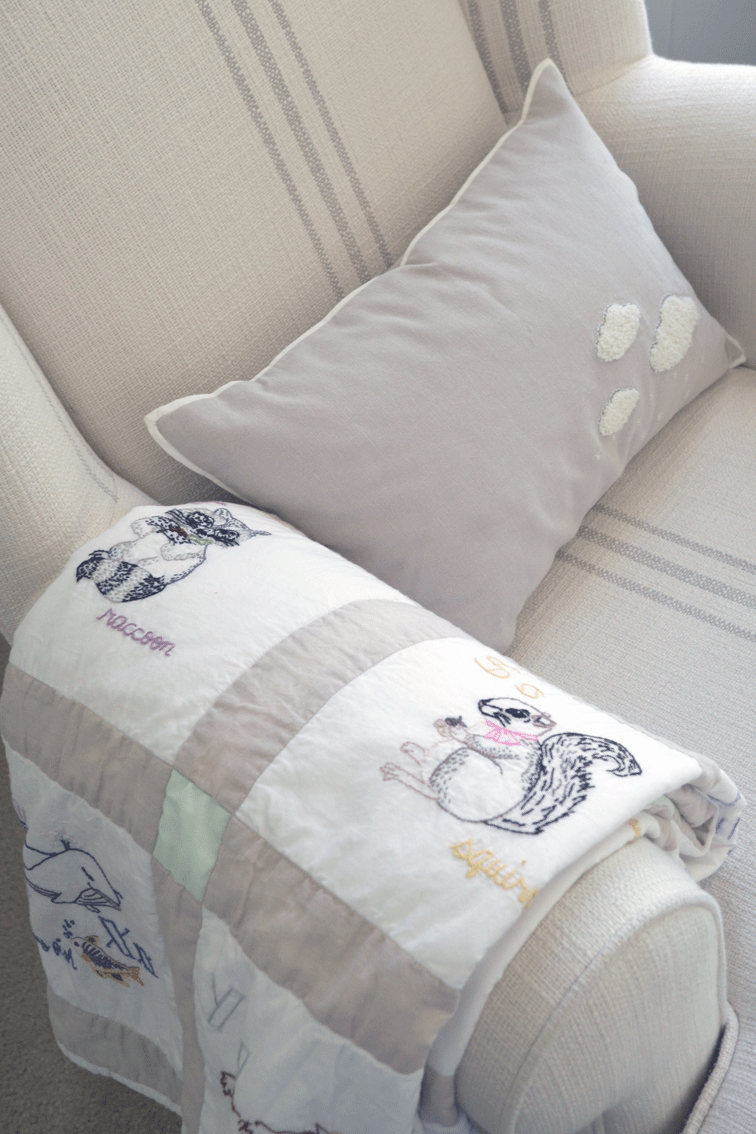
The dresser is IKEA, which I updated with new pulls. My husband made the changing pad holder and the diaper caddy, and the lamp is vintage. The art above the dresser was another easy DIY inspired by canvases from RH Baby & Child (no longer available). The rocking chair is from Pottery Barn Kids, the side table is from Homegoods (though I refinished it), the lamp is from Target, and the lamp shade was a great clearance find at RH Baby & Child. The curtains are technically from Pottery Barn (the 120″ panels were on super sale, and it was cheaper than buying equivalent fabric), but I added the trim and made the valance from the extra curtain length. I made the quilt on the chair 🙂
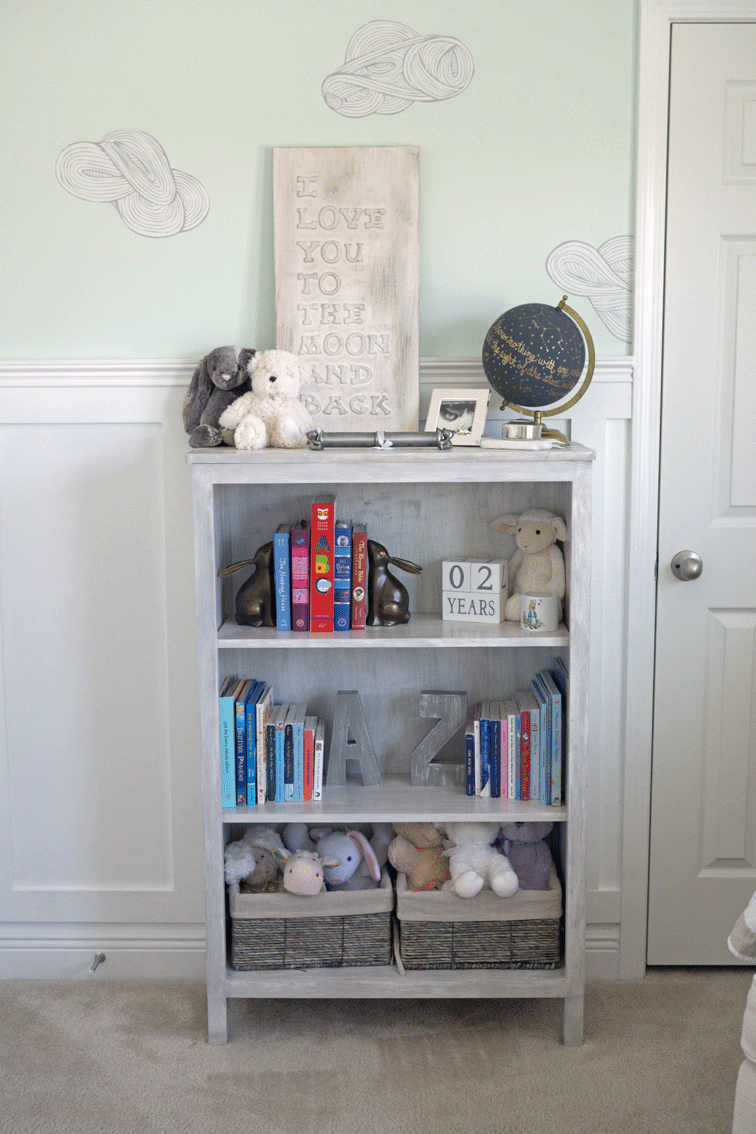
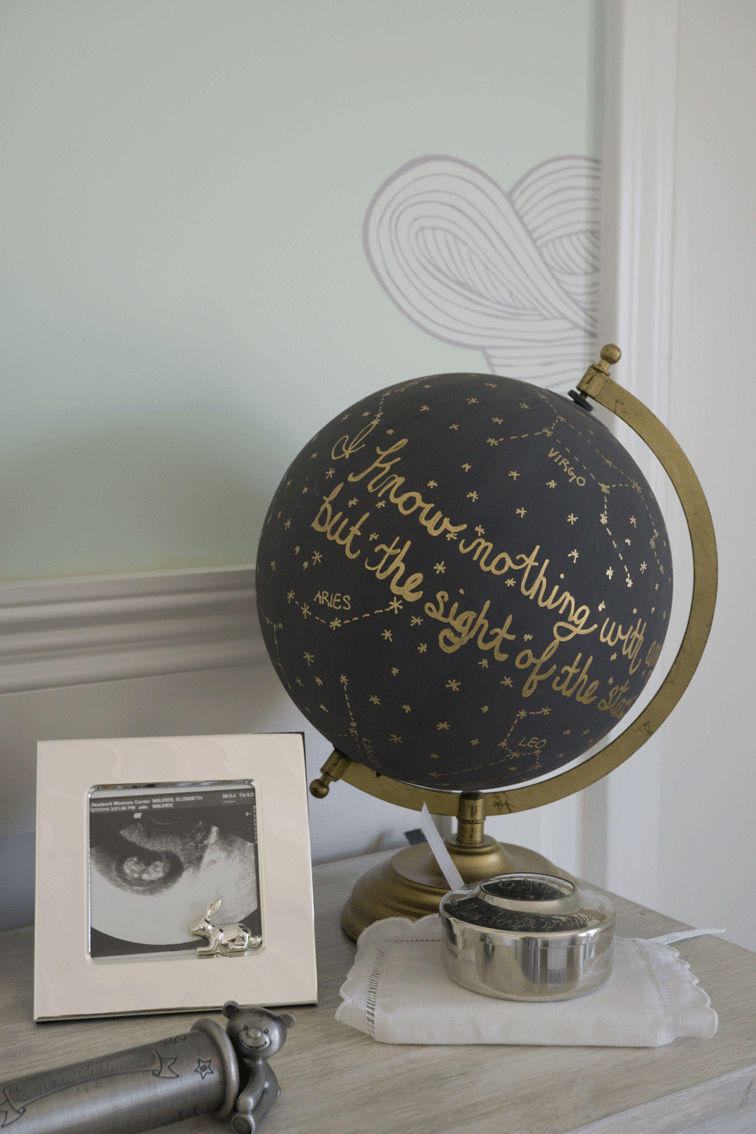
My husband made the bookshelf (based on my design) and I applied the paint finish. It is probably one of my favorite things in the room and I love the way it turned out. The “to the moon and back” canvas as well as the globe are both DIYs. The globe was inspired by some globes I saw at Anthropologie (no longer available), though I actually like mine better than the originals and it was a super easy project. I purchased the globe from Target, painted it with black chalk paint, and drew the constellations of each zodiac sign as well as some extra stars with a gold paint pen. The quote on the globe is: “I know nothing for certain, but the sight of the stars makes me dream” by Vincent Van Gogh (I love this quote and it seems so appropriate for the room).
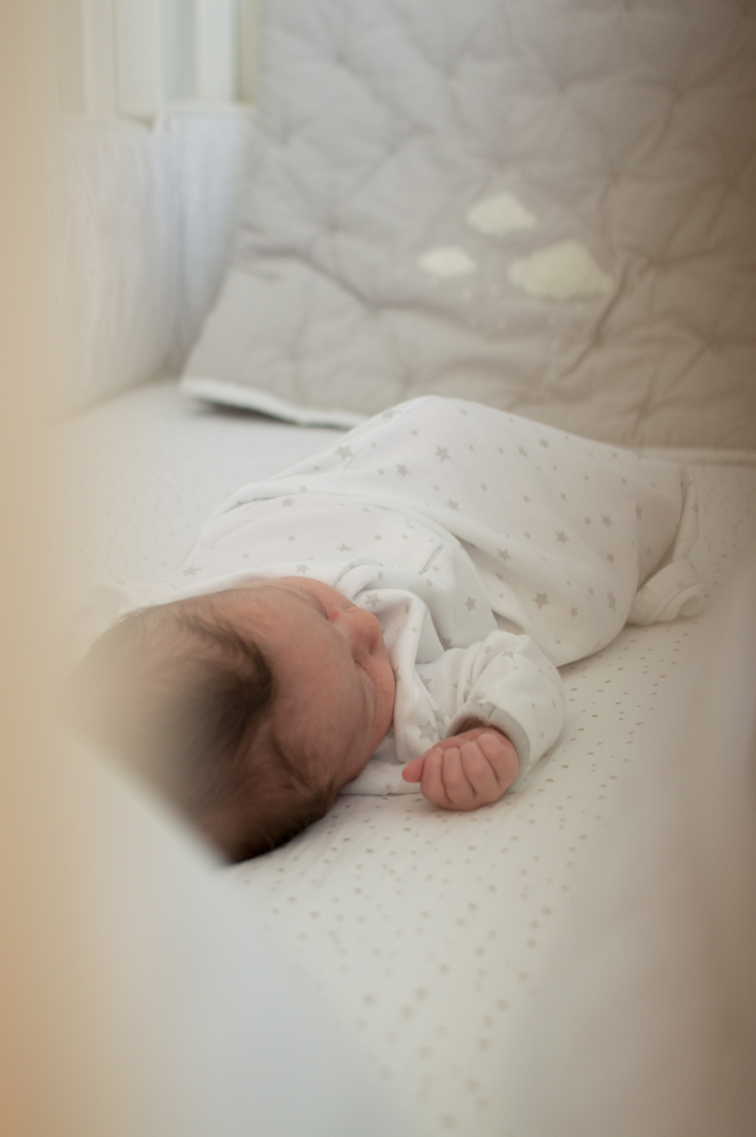
Well that is Emma’s nursery (I had to end the post with a picture of her in her nursery). I hope you love it as much as we do.
Sources:
Crib – Sorelle Bedford Classic Convertible Crib (no longer available in white, espresso, similar)
Bedding – RH Baby & Child Boucle’ Cloud Bedding (same)
Wall color – Spearmint Stick by Behr (same)
Wall paper (used as decals) – Daydream (Orange) Tiles, Hygge & West (same)
Ceiling Light Fixture – Moravian Star Pendant (same, similar)
Floor lamp – Target (exact no longer available, similar, similar, similar)
Mobile – DIY, inspired by this from RH Baby & Child
Dresser – Hemnes dresser from IKEA (same) updated with these ring pulls
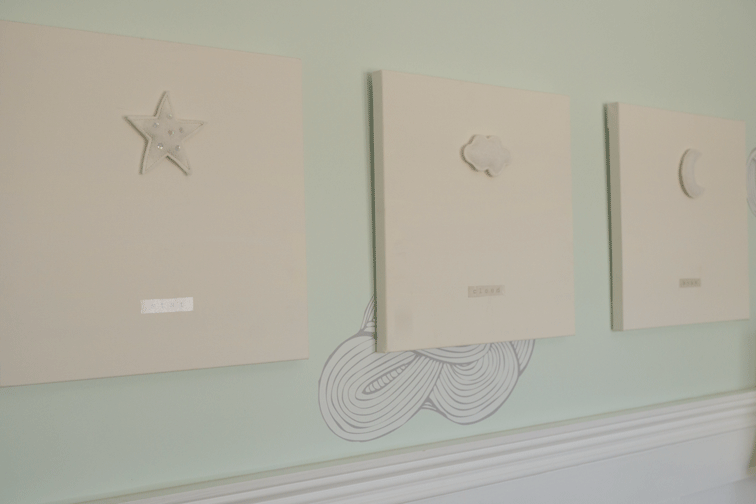
Square canvases – DIY, inspired by these (no longer available)
ABC animal quilt – handmade by me using my own embroidery designs
Bookshelf – made by my husband (similar, similar)
Bunny bookends – RH Baby & Child (same)
A Z bookends – DIY
Rocking chair – Pottery Barn Kids (same chair but fabric unavailable)
Globe – DIY
To the Moon and Back Canvas – DIY
Curtains – DIY using clearance Pottery Barn curtains (similar look, similar, similar)
Accent table – Homegoods (similar, similar)
Table lamp – Target (exact unavailable, similar, similar)
Thanks for reading!
~ Elizabeth
Note: This post does not contain any affiliate links. All links are simply to provide you with the resources to find the products I used (or similar products) and I am not receiving any type of compensation related to the links used in this post.


